Decoupage vs Photo Transfer on Furniture- Which is Right for Your DIY Project?
Decoupage vs. Photo Transfer on Furniture: A DIY Guide to Transform Your Space
Are you looking to transform your old furniture into a stunning piece of art but can’t decide between decoupage and photo transfer techniques? You’re in the right place! Both methods can turn plain furniture into unique creations, but they each have their own style and process.
Understanding Decoupage and Photo Transfer Techniques
Welcome to the world of furniture crafting! When considering decoupage vs photo transfer on furniture, it’s important to understand how each method works.
Decoupage is when you glue pictures or paper onto furniture to make it look pretty. You can use things like napkins or rice paper. Once you have your pictures in place, you cover everything with glue or varnish to keep it smooth and shiny. This method is great for adding fun designs and patterns. However, sometimes the materials, like rice paper, can be expensive for the print.
Photo transfer involves putting a photo directly onto your furniture. You use a special glue, like Mod Podge, to transfer the image onto wood. First, you apply the glue to the picture and the furniture, press them together, and then peel the paper away after it dries. This gives you a clean, photographic look. To get the best result, you’ll need high-resolution pictures, so you might find yourself struggling with finding a way to get your picture into a higher resolution.
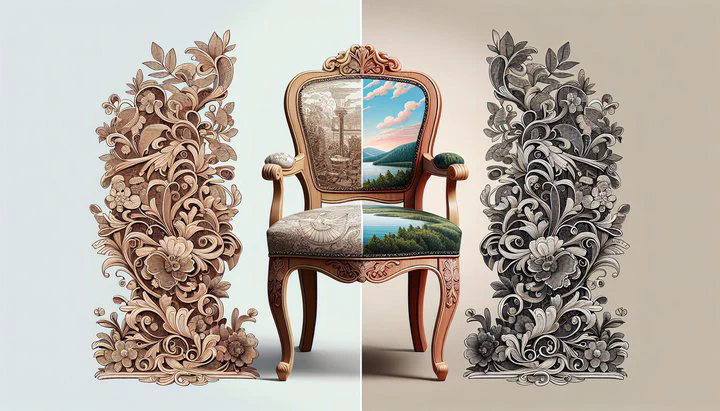
Both techniques are wonderful in their own way. If you love vibrant textures, try decoupage. If you want a sleek photo look, go for photo transfer. Whether you’re new to DIY or a seasoned pro, these methods will help you create something special.
Decoupage or Photo Transfer: Which to Choose?
Choosing between decoupage vs photo transfer on furniture doesn’t have to be hard. Let’s look at the pros and cons.
Decoupage is perfect if you like playing with colors and patterns. You can use different papers, from napkins to magazines. It’s also forgiving, great for beginners, and doesn’t require high-resolution images. But keep in mind, it can sometimes be expensive for the print on rice paper.
Photo transfer is ideal for those who want a polished look, like putting family photos on furniture. However, you’ll need clear, high-resolution images to avoid a blurry look. If you’re struggling with finding a way to get your picture into a higher resolution, try using online tools or photo editing software for help.
When deciding, think about the style you want and what materials you have. If you want something crafty and colorful, decoupage is your friend. If you prefer a clean photo finish, photo transfer is the way to go. Gather some advice for finding some that show color more accurately, as the right image can make all the difference. Remember, whether you choose decoupage or a photo transfer into the wood via Mod Podge, have fun and let your creativity shine!
Addressing Common Challenges
As you explore decoupage vs photo transfer on furniture, you’ll face some challenges, but don’t worry!
Finding high-resolution images can be tricky. Low-quality images might look blurry. Try finding images from reliable websites that offer high-resolution downloads. For those struggling with finding a way to get their picture into a higher resolution, photo editing software can help improve image quality.
Ensuring vibrant color reproduction is another challenge. Colors might fade or not appear as expected. Test a small area first, or use a scrap piece of wood. Seeking advice for finding some that show color more accurately can lead you to better quality inks and papers. Laser-printed images often have better color than inkjet prints.
For decoupage, materials can be expensive for the print on rice paper. To save money, use items like magazines or old wrapping paper. Community members often share tips on where to find affordable materials.
By preparing and using these tips, you can tackle any challenge and create beautiful furniture. Both decoupage and photo transfer are journeys of creativity and fun, so enjoy the process!
Step-by-Step Guide to Decoupage and Photo Transfer
Ready to start with decoupage or a photo transfer into the wood via Mod Podge? Here’s a simple guide to help you create amazing results.
Decoupage Guide
Materials Needed:
- Paper cutouts (napkins, rice paper, magazines)
- Decoupage glue (like Mod Podge)
- Paintbrush or foam brush
- Sandpaper (fine grit)
- Sealer (optional)
Steps:
- Prepare the Surface: Clean the furniture and sand it lightly to make it smooth. Wipe away dust with a damp cloth.
- Plan Your Design: Arrange your images on the surface to see how it looks before gluing.
- Apply the Glue: Brush a thin layer of glue where you want your image. Place the cutout and smooth it down to remove bubbles.
- Seal the Images: Cover all images with another layer of glue. Let it dry.
- Finish with a Sealer: For durability, apply a clear sealer for a glossy finish.
Photo Transfer Guide
Materials Needed:
- High-resolution image (laser-printed preferred)
- Photo transfer medium (Mod Podge Photo Transfer)
- Foam brush
- Soft cloth or sponge
- Sandpaper (fine grit)
- Sealer (optional)
Steps:
- Prepare the Surface: Clean and lightly sand the furniture. Make sure it’s dry.
- Prepare the Image: Cut the image to size and ensure it’s high-resolution.
- Apply the Transfer Medium: Use a foam brush to cover the printed side of your image with transfer medium.
- Transfer the Image: Place the image face-down on the surface and press it down firmly. Let it dry for 24 hours.
- Reveal Your Design: Dampen the paper and gently rub away the paper backing to reveal the image.
- Seal the Surface: Apply a clear sealer for protection and a professional finish.
Follow these steps to apply decoupage or a photo transfer into the wood via Mod Podge and create personalized furniture. Practice makes perfect, so keep experimenting!
Real-Life Examples and Inspirations
When deciding between decoupage vs photo transfer on furniture, seeing other projects can inspire you.
One DIYer transformed an old dresser with decoupage. Using colorful napkins and rice paper, they created a vibrant floral design, turning the dresser into a stunning room centerpiece.
Another project used photo transfer to personalize a coffee table with family photos. The result was a beautiful table filled with cherished memories.
One creative DIYer combined both techniques on nightstands. They used decoupage for the sides and photo transfer for the tops, mixing vintage clippings with a scenic landscape.
These examples show the endless possibilities with decoupage and photo transfer. With some imagination, you can give any furniture piece a new life. Whether you choose decoupage or a photo transfer into the wood via Mod Podge, the creative journey is yours to enjoy.
Now that you know the basics, why not try these techniques on a small piece of furniture? Share your creations with our community for more tips and inspiration!
Related
- How to Stain Pavers to Match Your Siding
- How to Reupholster Down Pillows- A Guide to Using Upholstery Shops and DIY Tips
- How to Replace Recessed Light Trim- A Step-by-Step Guide
- Restoring Furniture with Nicks and Scratches- A DIY Guide
- How to Paint Your Chain Link Fence Black and Enhance Your Home's Curb Appeal