DIY Popcorn Ceiling Removal with Asbestos
How to Safely Remove Popcorn Ceilings with Asbestos: A DIY Guide
Removing popcorn ceilings can update the look of your home, but if your ceiling contains asbestos, there are serious safety concerns to consider. This guide will walk you through safely tackling a DIY popcorn ceiling removal with asbestos. Remember, safety comes first, so always follow precautions.
Understanding the Risks of Asbestos in Popcorn Ceilings
Popcorn ceilings might seem harmless, but if they contain asbestos, they can be dangerous. Asbestos is a natural mineral once used for its fire-resistant properties. Unfortunately, tiny fibers from asbestos can become airborne when disturbed. Breathing these fibers can cause serious lung diseases like lung cancer, asbestosis (a lung disease), and mesothelioma (a rare cancer affecting the lining of the lungs or abdomen).
Before you start your DIY popcorn ceiling removal with asbestos, it’s crucial to test your ceiling. You can buy a testing kit or hire a professional to see if asbestos is present. Some local laws might require testing before removal, so check regulations in your area. If asbestos is found, consider hiring a professional for removal. If you choose to go the DIY route, ensure you follow strict safety guidelines.
Preparing for Safe Popcorn Ceiling Removal
Ready to tackle that popcorn ceiling? If you suspect it contains asbestos, preparation is key to keeping yourself safe. Before you begin your DIY popcorn ceiling removal with asbestos, make sure you have all the necessary tools and protective gear. You’ll need a few specific items to ensure a safe and efficient removal process.
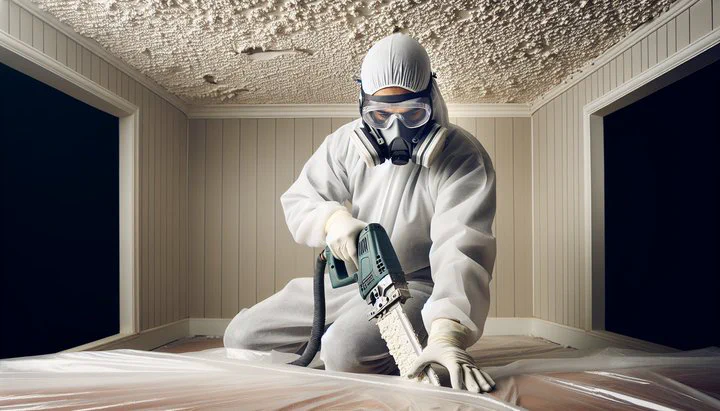
- Protective Equipment: Wear a high-quality respirator to avoid inhaling any tiny particles, safety goggles for eye protection, and disposable coveralls to keep your clothes clean. Don’t forget gloves to protect your skin.
- Plastic Sheeting: Use it to cover floors and seal off other areas of your home to prevent dust and debris from spreading.
- Room Setup: Clear out furniture and cover any remaining items with plastic sheeting. Tape the sheeting securely to the floors and walls, and seal doorways to keep other parts of your home safe.
It’s important to have the right tools on hand. Gather a garden sprayer or spray bottle filled with water, a wide putty knife or ceiling scraper, and a sturdy ladder to reach the ceiling safely.
By preparing properly, you ensure a safer environment for tackling the DIY popcorn ceiling removal with asbestos. Take your time setting up, and double-check that everything is in place before you start. With the right preparation, you’ll be ready to move on to the next step: wet scraping the popcorn ceiling.
Step-by-Step Guide to Wet Scraping Popcorn Ceilings
Now that you’re all set up and ready, it’s time to tackle the popcorn ceiling removal process. Wet scraping is a crucial technique for safely removing popcorn ceilings, especially when dealing with asbestos. It helps keep the materials damp, reducing the chance of asbestos fibers becoming airborne. Let’s dive into the step-by-step process.
-
Wet the Ceiling:
- Fill a garden sprayer or spray bottle with water.
- Wet the popcorn ceiling thoroughly to make it easier to scrape off.
- Spray section by section, allowing the water to soak in for about 15 minutes to soften both painted and unpainted popcorn ceilings.
-
Scrape the Ceiling:
- Use a wide putty knife or ceiling scraper, starting at one corner and moving across the ceiling.
- Keep the scraper at a shallow angle to avoid damaging the drywall.
- For painted areas, you might need to spray and scrape several times.
-
Tackle Trouble Spots:
- Some areas might be harder to scrape, especially if they’re painted.
- Spray those spots again with water and let them soak longer.
- Use a bit more pressure or a gentle back-and-forth motion if needed.
-
Keep It Wet:
- Continuously spray any dry spots to keep the ceiling damp.
- Keeping the material wet is essential to prevent asbestos fibers from becoming airborne.
By following these steps and staying patient, you’ll successfully scrape off that popcorn ceiling. Once you’ve finished scraping, you’re ready to move on to the cleanup phase. Remember, safety is your top priority, so continue to use your protective gear until the entire process is complete.
Cleaning Up After Popcorn Ceiling Removal
Congratulations on making it through the scraping process! Now, it’s time to tackle the cleanup, which is just as important as the removal itself. Proper cleanup ensures that any remaining asbestos particles are safely dealt with, keeping your home and family safe.
-
Carefully Remove Plastic Sheeting:
- Fold the sheeting inward to trap any dust and debris, then dispose of it in heavy-duty trash bags.
- Seal the bags tightly before disposing of them according to local regulations.
-
Vacuum Every Nook and Cranny:
- Use a vacuum with a HEPA filter to vacuum every nook and cranny you can find.
- Pay special attention to corners, baseboards, and any other areas where dust might have settled.
-
Wipe Down Surfaces:
- Wipe all the walls down with a damp microfiber cloth to pick up any remaining dust or debris.
- A damp cloth captures particles more effectively than a dry one, reducing the risk of them becoming airborne.
-
Scrub the Floors:
- Run the scrubber more after that on the floors to ensure everything is spotless.
- Use a damp mop or floor scrubber with a mild cleaning solution to go over the entire area.
By following these steps, you’ll ensure that your home is clean and safe after your DIY popcorn ceiling removal with asbestos. Remember, thorough cleaning is key to minimizing any health risks associated with asbestos. Once you’re finished, you can move on to the next phase of your project with confidence.
Post-Removal Considerations and Next Steps
You’ve successfully removed your popcorn ceiling, but what’s next? After completing a DIY popcorn ceiling removal with asbestos, there are a few important steps to consider to ensure your home remains safe and your ceiling looks great.
-
Inspect for Any Remaining Asbestos:
- Hire a professional to inspect your ceiling and confirm that all asbestos has been removed.
-
Repair Any Ceiling Damage:
- Use joint compound to fix gouges or uneven spots left by the scraping process.
- Smooth it out, let it dry, then sand lightly for a seamless finish.
-
Explore New Ceiling Finishes:
- Choose a new finish for your ceiling, whether it’s a smooth surface, a new texture, or ceiling tiles.
- Consider painting with high-quality ceiling paint for a fresh look.
-
Plan for Future Maintenance:
- Regularly clean and inspect your ceiling for any signs of damage.
- Touch up painted areas as needed to keep your ceiling looking its best.
Taking these steps after your DIY popcorn ceiling removal with asbestos will leave your home safer and more attractive. By inspecting for asbestos, repairing damage, and exploring new designs, you’re not only improving your living space but also protecting your health. Enjoy your refreshed home, and take pride in the work you’ve accomplished!
Related
- How to Stain Pavers to Match Your Siding
- How to Reupholster Down Pillows- A Guide to Using Upholstery Shops and DIY Tips
- How to Replace Recessed Light Trim- A Step-by-Step Guide
- Restoring Furniture with Nicks and Scratches- A DIY Guide
- How to Paint Your Chain Link Fence Black and Enhance Your Home's Curb Appeal