Expert Advice on Choosing and Using Leather Recoloring Products for Couches
Expert Advice on Choosing and Using Leather Recoloring Products for Couches
Understanding Leather Couch Discoloration and Damage
Is your leather couch looking a bit tired and worn out? You’re not alone! Many people notice discoloration throughout their leather furniture, as well as what appear to be small pen marks. These common issues can make your once-beautiful couch look less appealing. But don’t worry—understanding what’s causing these problems is the first step to fixing them. With the right leather recoloring product advice, you can bring your couch back to life!
Leather couches can lose their color for a few reasons. One of the biggest culprits is sun exposure. Just like our skin, leather doesn’t like too much sun. Over time, those rays can cause the leather to fade, leading to an uneven color. Another common issue is stains from spills or everyday use. Drinks, food, or even oils from your skin can leave marks. And then there are those pesky pen marks that seem to appear out of nowhere!
To tackle these issues, it’s important to know what type of damage you’re dealing with. Discoloration can be widespread or in patches, while scratches and pen marks are usually more localized. Take a close look at your couch to assess the damage. This step will help you decide on a solution, like a leather recoloring product. Whether you’re dealing with fading or specific marks, choosing the right approach is key to restoring your leather couch to its former glory.
Preparing Your Leather Couch for Recoloring
Before you jump into using a leather recoloring product, it’s crucial to prepare your couch properly. This step will not only help in removing surface marks, like those black pen marks, but also ensure that the leather is ready to absorb the new color effectively. Think of it like painting a wall—you wouldn’t skip the primer, right? The same goes for your leather couch.
Step 1: Cleaning the Leather
Start by giving your couch a good cleaning. Use a mild soap or a leather cleaner, and gently wipe down the entire leather part of the main body of the couch. This will help get rid of any dirt, oils, and light stains. Pay special attention to areas with discoloration throughout as well as spots with pen marks. While cleaning, you might find that some marks lighten or disappear entirely.
Step 2: Conditioning for Better Results
Once your couch is clean, it’s time to condition the leather. Conditioning is like giving your couch a drink of water. It keeps the leather supple and helps it absorb the recoloring product more evenly. Use a quality leather conditioner and apply it following the product instructions. This step can sometimes help lift even more of those stubborn pen marks, so don’t skip it!
Step 3: Let It Dry
After cleaning and conditioning, allow your couch to dry completely. This is super important because recoloring products adhere best to dry surfaces. Give it some time—patience here will pay off when you see a nice, even color later. With your couch prepped and ready, you’re all set to choose the leather recoloring product that best suits your needs. Whether you’re considering something darker to cover up those marks or a shade closer to the original color, a well-prepared couch is the key to success.
Choosing the Right Leather Recoloring Product
Picking the right leather recoloring product can feel overwhelming with so many options out there. But don’t worry, finding the perfect match for your couch is easier than you think! The first step is to understand the types of products available. You’ll generally find two main types: dyes and creams. Both can work wonders, but the best choice depends on your specific needs.
Dyes are great if you’re dealing with discoloration throughout your couch. They soak into the leather, providing a more permanent solution. This makes dyes a good choice if you’re looking for a major color change or if you want to cover up noticeable marks and fading. On the other hand, creams sit on the surface and are excellent for touch-ups or enhancing the existing color. They’re easier to apply and can be a quick fix for smaller areas or small pen marks.
When choosing a color, consider going a shade darker than your current couch. This strategy can help hide imperfections and provide a fresh, uniform look. If your couch has discoloration throughout as well as what appear to be small pen marks, selecting a darker shade can be a smart move. It’s also a good idea to test a small, hidden area first to ensure you’re happy with the color before committing to the entire couch.
Another tip is to look for products with added conditioners. These can help keep the leather soft and supple, which is especially important if your couch has been exposed to the sun or has had previous damage. A product that not only recolors but also conditions can give you the best of both worlds.
Finally, don’t hesitate to read reviews or seek recommendations from others who have tackled similar projects. Community insights can offer valuable advice and help you feel more confident in your choice. Once you’ve picked your leather recoloring product, you’re ready to move on to the application process. With the right product in hand, your couch will soon look as good as new!
Step-by-Step Guide to Applying Leather Recoloring Products
Now that you’ve picked the perfect leather recoloring product, it’s time to bring your couch back to life! Applying the product correctly is crucial for achieving a smooth, even finish. Follow these easy steps to ensure your leather couch looks its very best.
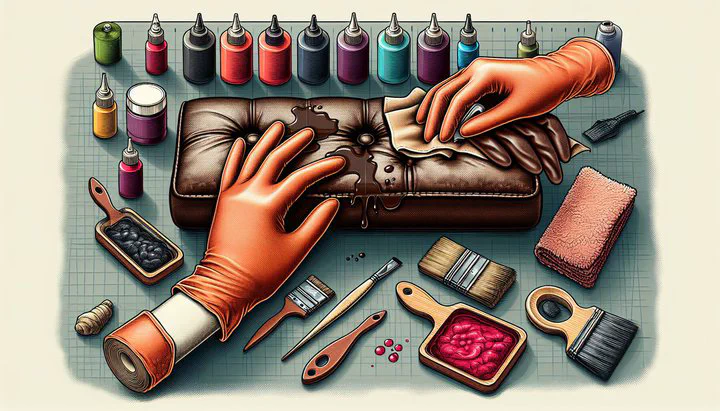
Step 1: Gather Your Supplies
Before you start, make sure you have everything you need. This includes your chosen leather recoloring product, a clean cloth, a sponge or brush for application, and gloves to protect your hands. Having all your supplies ready will make the process go smoothly.
Step 2: Test a Small Area First
It’s always a good idea to test the product on a hidden area of your couch. Apply a small amount of the recoloring product to see how it looks once it dries. This step ensures that you’re happy with the color and that the product works well with your specific type of leather.
Step 3: Apply the Product Evenly
Start by applying the recoloring product to the leather part of the main body of the couch. Use a sponge or brush to spread the dye or cream evenly over the surface. Apply in small sections, using smooth, circular motions to avoid streaks. If you’re dealing with discoloration throughout as well as marks, make sure to cover these areas well. Take your time to ensure even coverage.
Step 4: Let It Dry Completely
After applying the product, allow it to dry thoroughly. Depending on the product, drying times can vary, so be sure to follow the instructions on the packaging. Some products may require multiple coats for the best result. If so, make sure each layer is dry before applying the next one.
Step 5: Buff and Condition
Once the final coat is dry, give your couch a gentle buff with a clean, soft cloth. This will help bring out the shine and smoothness of the leather. To keep your couch looking great for the long haul, consider applying a leather conditioner after the recoloring process. Conditioning helps maintain the suppleness of the leather and prolongs the life of the color.
By following these steps, you can achieve a professional-looking result that brings your couch back to its former glory. With a bit of patience and care, your leather couch will look fresh and inviting, ready to be the centerpiece of your living room once again. You can do this!
Maintaining Your Recolored Leather Couch
Congratulations on giving your leather couch a fresh new look! To keep it looking its best, regular maintenance is key. With a little ongoing care, you can enjoy your vibrant, recolored couch for years to come. Here’s how to maintain your couch and protect your hard work.
Regular Cleaning
Dust and dirt can collect on your couch over time, dulling its appearance. To prevent this, gently wipe down the leather part of the main body of the couch with a soft, dry cloth every week. This simple step helps keep the surface clean and preserves the color. If you notice any small spills or stains, clean them up quickly with a damp cloth to avoid permanent marks.
Conditioning is Crucial
Leather needs moisture to stay soft and supple. By conditioning your couch every few months, you can prevent it from drying out and cracking. Choose a leather conditioner that complements your leather recoloring product and follow the instructions carefully. Conditioning not only keeps the leather in good shape but also helps maintain the color you’ve worked so hard to achieve.
Avoid Direct Sunlight
Remember that sun exposure was one of the main causes of discoloration throughout your couch. To protect your recolored leather, try to position your couch away from direct sunlight, or use curtains or blinds to limit exposure. This will help prevent fading and keep the color vibrant.
Quick Fixes for Marks
If you notice any new marks, like those pesky small pen marks, address them promptly. Sometimes, a good cleaning and conditioning routine can help remove or lessen these marks. If needed, you can do a quick touch-up with a small amount of your recoloring product. Just remember to test a hidden area first, as you did during the initial application.
Community Tips and Tricks
Learning from others who have recolored their couches can be incredibly helpful. Check out community forums and reviews for tips on the best products and techniques. Hearing about others’ experiences can provide you with new ideas and boost your confidence in maintaining your couch.
By incorporating these habits into your routine, you can enjoy your beautifully recolored leather couch for a long time. With regular care and attention, your couch will remain a stylish and comfortable addition to your home. Remember, it’s easier than it looks!