How to Replace an LED Driver for Your Bathroom Mirror
How to Replace an LED Driver for Your Bathroom Mirror
Having trouble with the lights on your bathroom mirror? It’s possible that the LED driver needs replacing. In this guide, you’ll learn about the importance of LED drivers, how to identify when they need replacing, and how to do it yourself. Let’s get started!
Understanding the Role of an LED Driver in Your Bathroom Mirror
If you’ve ever wondered why your bathroom mirror’s lights are so bright and efficient, it’s all thanks to a small but mighty component called the LED driver. This little device is a crucial part of your bathroom mirror’s lighting system, ensuring the LED lights perform at their best. But what exactly does an LED driver do, and why is it so important?
An LED driver is like a power manager for your LED lights. It takes the electricity from your home’s power supply and converts it into a form that can safely and efficiently power the LEDs. Without the driver, the LED lights in your mirror could receive too much or too little electricity, which can cause them to flicker or burn out quickly. The LED driver makes sure that your lights have just the right amount of power to shine brightly and last a long time.
In bathroom mirrors, especially, the LED driver is essential. Bathrooms are often damp, and the last thing you want is a faulty lighting system. The driver not only powers the LEDs but also helps protect them from moisture and other environmental factors that could cause damage. That’s why, when your bathroom mirror driver goes out, it’s important to replace it with a compatible replacement LED driver to keep everything working smoothly.
Understanding how an LED driver works can help you see why it’s so important for your bathroom mirror. By converting and regulating electricity, the driver ensures your lights are bright, safe, and long-lasting. So, the next time you flick on your bathroom mirror lights, you’ll know the LED driver is the unsung hero making it all possible.
Signs Your Bathroom Mirror LED Driver Needs Replacement
Have you noticed your bathroom mirror lights flickering or not turning on at all? These could be signs that your bathroom mirror driver went out. Knowing the symptoms of a failing LED driver can help you fix the problem quickly and avoid more serious issues down the line.
One of the most common signs that something is wrong with your LED driver is flickering lights. If the lights in your mirror flicker like a strobe light or dim and brighten randomly, the driver may not be supplying consistent power to the LEDs. Another sign is if the lights don’t turn on at all. This could mean the driver has failed completely and is not providing any power.
To be sure the LED driver is the issue, you can perform a simple test. First, check if other lights in your home are working to rule out a power outage. Next, see if the mirror lights work when connected to a different power source. If they do, then the driver is likely the problem. You can also use a device to check electricity flow to see if electricity is flowing through the driver, but be careful and take safety precautions, as working with electricity can be dangerous.
If you suspect your bathroom mirror’s LED driver is the culprit, it’s time to look for a replacement LED driver for your bathroom mirror. This will ensure that your lights work properly and efficiently. Remember, a failing driver not only affects lighting but can also damage your LEDs over time. By addressing the issue promptly, you can maintain a bright and reliable bathroom mirror setup.
Choosing the Right Replacement LED Driver
When your bathroom mirror driver goes out, finding the right replacement LED driver is crucial to get your lights working again. But how do you choose the right one? Don’t worry—it’s easier than you might think! Let’s go through the steps to pick a suitable replacement LED driver for your bathroom mirror.
First, take a closer look at the specifications of your current LED driver. This information is usually printed on the driver itself or included in the mirror’s user manual. Key specs to note are the voltage and current ratings. These numbers tell you how much power the driver can handle and how much it can supply to your LED lights. It’s important to find a replacement driver with similar specifications to ensure compatibility.
Once you have the specs, you can start searching for a replacement LED driver. Make sure the new driver matches the voltage and is close to the current rating of your old one. Sometimes, the output amps is a little off, and that’s okay as long as the difference is small. For example, if your original driver outputs 500mA, a new driver with 480mA or 520mA might still work fine. However, it’s always best to consult with an expert if you’re unsure.
When shopping for a replacement, you might wonder, “Can anyone recommend a replacement product?” A popular choice among DIY enthusiasts is the Model EPV-12050. This model is known for its reliability and compatibility with many LED mirrors. Always check reviews and double-check compatibility before making your purchase.
By understanding the specifications of your current driver and choosing a compatible replacement, you can confidently tackle this home improvement task. With the right replacement LED driver, your bathroom mirror will shine brightly once again, making your daily routine smoother and more enjoyable.
Recommendations for Replacement Products
When your bathroom mirror driver goes out, it can be a bit daunting to find the right replacement. But don’t worry, we’re here to help you discover some great options to get your mirror lights shining bright again. Let’s explore some recommended replacement LED drivers that are both reliable and easy to install.
One top recommendation is the Model EPV-12050. This driver is a favorite among many homeowners for its durability and compatibility with various LED bathroom mirrors. It provides a stable power supply to your LED lights, ensuring they remain bright and flicker-free. The Model EPV-12050 is also compact, making it easy to fit into the space behind your mirror. Before purchasing, double-check its specifications to ensure they match or are close to those of your original driver.
Another great option is the XYZ-4500 model. This LED driver is known for its energy efficiency and ability to maintain consistent lighting. It’s a solid choice if you’re looking for something that can handle slight variations in power needs. Remember, if you find that the output amps is a little off, a small difference might still be acceptable, but it’s always wise to confirm this with a professional or the product manual.
You might also be asking, “Can anyone recommend a replacement product?” In addition to the above models, consider consulting online forums or home improvement communities. Websites like HomeSolver offer insights and reviews from fellow DIY enthusiasts who have tackled similar projects. Their real-life experiences can guide you to make a confident decision.
By choosing from these recommended products, you’re well on your way to restoring your bathroom mirror’s lighting. Just remember to confirm compatibility with your current setup, and soon enough, you’ll have a bright and functional mirror once again.
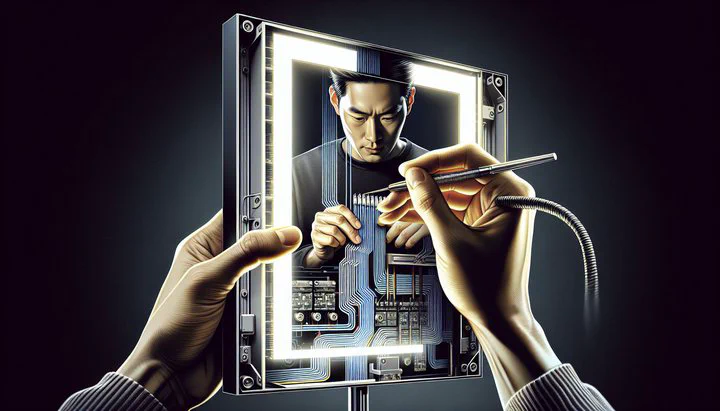
Step-by-Step Guide to Replacing Your Bathroom Mirror LED Driver
Replacing a replacement LED driver for your bathroom mirror might sound tricky, but with a little guidance, you can handle it like a pro! Follow these simple steps to get your mirror lights back in action safely and efficiently.
Tools You’ll Need
Before you start, gather these tools to make the job easier:
- Screwdriver (Phillips or flathead, depending on your mirror)
- Device to check electricity flow (multimeter)
- Wire stripper/cutter
- Electrical tape
- Replacement LED driver (like the Model EPV-12050)
Step-by-Step Instructions
-
Turn Off the Power: Safety first! Make sure to switch off the power to your bathroom mirror at the circuit breaker. Test the lights to ensure they’re off before proceeding.
-
Remove the Mirror from the Wall: Carefully detach the mirror to access the back. Use a screwdriver to remove any screws or fasteners holding it in place. Have a friend help if it’s heavy.
-
Locate the Old Driver: Once the mirror is off, find the old LED driver. It’s usually a small box connected to the LED lights with wires.
-
Disconnect the Old Driver: Take note of how the wires are connected—take a picture if needed. Carefully disconnect the wires from the old driver. Use a screwdriver to loosen any screws and a wire cutter to snip any secured connections.
-
Install the New Driver: Connect the new driver, like the Model EPV-12050, following the wiring pattern you noted earlier. Ensure the voltage and current match your old driver as closely as possible. If the output amps is a little off, that’s okay if it’s a minor difference.
-
Secure the Connections: Use electrical tape to cover exposed wires and ensure all connections are tight. This prevents moisture from causing any issues.
-
Test the Setup: Before reattaching the mirror to the wall, turn the power back on. Check if the lights work properly. If they flicker or don’t turn on, double-check your connections.
-
Reattach the Mirror: Once you’re sure everything works, carefully reattach the mirror to the wall. Secure it with screws or fasteners, and make sure it’s stable.
Safety Tips
- Always work in a dry area and avoid standing on wet floors.
- If you’re unsure about handling electrical components, consider consulting a professional.
By following these steps, you’ll have your bathroom mirror shining bright again in no time. With the right tools and a bit of patience, replacing an LED driver can be a straightforward DIY project. Enjoy the bright, efficient lighting for your daily routine!
Conclusion
Replacing the LED driver in your bathroom mirror is a task you can confidently tackle with the right information and tools. Remember to choose a compatible replacement LED driver, like the Model EPV-12050, and follow the step-by-step guide to ensure safe and successful installation. Share your experiences or ask questions in the comments below, and visit HomeSolverGuide.com for more tips. Engage with our community to learn and share more about DIY home projects. Happy fixing!
Related
- How to Stain Pavers to Match Your Siding
- How to Reupholster Down Pillows- A Guide to Using Upholstery Shops and DIY Tips
- How to Replace Recessed Light Trim- A Step-by-Step Guide
- Restoring Furniture with Nicks and Scratches- A DIY Guide
- How to Paint Your Chain Link Fence Black and Enhance Your Home's Curb Appeal