Restoring Furniture with Nicks and Scratches- A DIY Guide
Understanding Furniture Damage: Nicks and Scratches
Have you ever noticed those pesky nicks and scratches on your favorite piece of furniture? It can be frustrating, but don’t worry—you’re not alone. Knowing why these happen helps you fix them better. Let’s dive into what often leads to these imperfections.
Common Causes: There are several reasons why furniture may end up with nicks and scratches. One frequent cause is moving furniture around, which can result in bumps and scrapes against walls or other objects. Accidents happen, whether it’s knocking over a piece of decor or a child using a table as a playground. Pets, with their claws and playful nature, can also contribute to these marks. Each scenario leaves its mark, but they are all part of a well-loved home. Do you know what caused the nicks and scratches on your furniture?
Assessing the Damage: Before you start the furniture restoration process, you’ll need to assess the severity of the nicks and scratches. Light scratches might just affect the surface finish, while deeper nicks could expose the underlying material. The type of material—wood, laminate, or veneer—also plays a key role in determining the best repair method. Take a close look at the damage: Is it just a scratch on the surface, or does it feel like a groove? This will help you decide how to proceed.
Materials Matter: Different materials react differently to damage. For instance, wood is generally more forgiving and easier to repair than laminate or veneer. Understanding the material of your furniture is crucial in selecting the right restoration method. A small scratch on a wooden table might need just a light sanding, while a similar mark on a veneer surface could require more careful handling to avoid exposing the thin layer beneath.
By understanding the types and causes of nicks and scratches on furniture, you’ll be better prepared to restore your pieces to their former glory. In the next sections, we’ll explore the tools you’ll need and the step-by-step process for repairing minor furniture damage. With a little patience and the right approach, you can bring your furniture back to life!
Essential Tools and Materials for Furniture Restoration
Ready to tackle those nicks and scratches on your furniture? Before you start, you’ll need to gather some essential tools and materials. Having the right equipment at your fingertips will make the furniture restoration process smoother and more effective.
Basic Tools You’ll Need
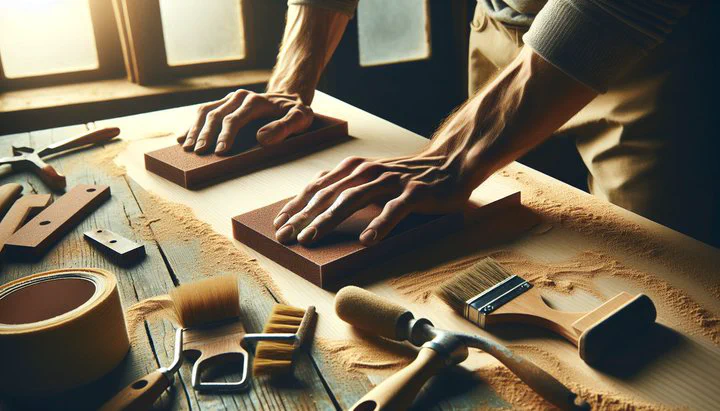
To begin restoring furniture with nicks and scratches, you’ll want to have a few basic tools on hand. Sandpaper is a must-have for smoothing out scratches and preparing surfaces for refinishing. It’s a good idea to have a range of grits, from coarse to fine—use 220-grit sandpaper for a finer finish. You’ll also need a putty knife for applying wood filler to deeper nicks and gouges.
Paintbrushes or cloths are necessary for applying paint or stain. Choose brushes that are the right size for your furniture pieces; smaller brushes work better for detailed areas. For protecting yourself, don’t forget gloves and a mask to keep dust and fumes at bay while you work.
Materials to Have on Hand
When it comes to materials, wood filler is essential for repairing deeper nicks. Choose a filler that matches your furniture’s color for the best results. If you’re working with laminate or veneer, there are special fillers designed for these surfaces too. For finishing touches, you’ll need paint or stain to blend your repairs with the rest of the piece. Make sure to pick a color that matches your furniture.
To protect your restored furniture, consider using a varnish or wax. These products seal your repairs and keep the surface looking fresh and shiny. If you’re unsure which finish to use, ask for advice at your local hardware store—they can recommend the best option based on your furniture type.
Tips for Choosing the Right Products
Selecting the right products can be tricky, especially with so many options available. When choosing sandpaper, remember that a higher grit number means a finer finish. For fillers, check the label to ensure compatibility with your furniture material. If you’re using paint or stain, test a small, hidden area first to see how the color looks when dry.
Equipping yourself with these tools and materials sets you up for success in repairing minor furniture damage. In the next section, we’ll dive into the step-by-step process of fixing those pesky nicks and scratches. With your tools ready, you’ll soon be on your way to making your furniture look as good as new!
Step-by-Step Guide to Repairing Minor Furniture Damage
Now that you have your tools and materials ready, it’s time to start repairing those nicks and scratches on furniture. Follow this simple, step-by-step guide to tackle the furniture restoration process with confidence.
-
Step 1: Clean the Surface
Before you begin any repairs, make sure the surface of your furniture is clean. Use a soft cloth and a mild cleaner to remove any dust, dirt, or grease. This ensures that your repairs will adhere properly and look seamless when finished. -
Step 2: Sand the Area
For light scratches, gently sand the area using fine-grit sandpaper. Sand in the direction of the wood grain to avoid further damage. This will smooth out the scratch and prepare the surface for filling or staining. For deeper nicks, you may need to start with a coarser grit to even out the surface before switching to a finer grit. -
Step 3: Apply Wood Filler
If you’re dealing with deeper nicks or gouges, apply wood filler using a putty knife. Use the putty knife to spread the filler evenly into the nick. Choose a filler that closely matches the color of your furniture. Allow it to dry completely as per the instructions on the packaging. Once dry, lightly sand the area again to ensure a smooth finish. -
Step 4: Stain or Paint the Repaired Area
To blend the repaired area with the rest of the furniture, apply stain or paint. Use a small brush for precision, and apply in thin layers. If you’re unsure about the color match, test it first on a hidden area. Allow each layer to dry fully before applying the next. This will help the repaired section blend seamlessly with the existing finish. -
Step 5: Protect the Surface
Once you’ve repaired and matched the color, protect your work by applying a finish like varnish or wax. This will seal the repair and give your furniture a polished look. Use a clean brush or cloth and apply evenly, following the grain of the wood. This step not only enhances the appearance but also helps prevent future damage.
By following these steps, you’ll be well on your way to repairing minor furniture damage and restoring furniture with nicks and scratches. Remember, patience is key, and taking your time will lead to the best results. In our next section, we’ll discuss how to add those final finishing touches to your restored furniture to ensure long-lasting beauty.
Finishing Touches: Refinishing and Protecting Restored Furniture
Congratulations! You’ve repaired the nicks and scratches on your furniture, and now it’s time to add those finishing touches. Refinishing and protecting your restored furniture is the final step in the furniture restoration process. This will not only enhance the beauty of your piece but also ensure it stays looking great for years to come.
Applying a Protective Finish
After repairing minor furniture damage, it’s important to seal the surface. Applying a protective finish like varnish or wax can make a big difference. These finishes help protect against future scratches and spills, keeping your furniture looking its best. Varnish is great for a glossy, durable finish, while wax provides a softer, more natural look. Choose the one that matches the style you want.
To apply, use a clean brush or cloth and follow the grain of the wood. Apply the finish in even, thin layers, allowing it to dry completely between coats. This ensures a smooth, professional-looking result.
Matching Existing Finishes
Sometimes, the hardest part of restoring furniture with nicks and scratches is making sure the repaired area matches the rest of the piece. If you’re using stain or paint, try to match the existing color as closely as possible. Testing on a hidden spot can help you get it just right. If needed, adjust the shade by mixing colors or using a different finish.
For a truly seamless look, consider buffing the entire piece lightly after applying the finish. This helps blend the old and new surfaces together, giving a uniform appearance.
Maintenance Tips for Long-Lasting Results
Keep your furniture looking nice with regular care. Dust your furniture regularly with a soft, dry cloth to prevent buildup. Avoid using harsh chemicals; instead, opt for gentle cleaners suited for your furniture’s material.
Place coasters under drinks and use placemats to protect surfaces from heat and moisture. For wooden furniture, consider re-waxing or re-varnishing every few years to maintain its protective layer.
By taking these steps, you’ll not only complete the furniture restoration process but also ensure your piece remains a cherished part of your home. With a little care and attention, your furniture will continue to shine and withstand the test of time. Once you’ve finished, share a picture of your restored furniture with the HomeSolver community! Next, we’ll share some real-life success stories and tips from the HomeSolver community to inspire your next project!
Real-Life Examples and Community Tips
Restoring furniture with nicks and scratches can feel like a big task, but hearing from others who have successfully tackled similar projects can be both inspiring and reassuring. In this section, we’ll share some real-life examples and tips from the HomeSolver community to help you on your furniture restoration journey.
Community Success Stories
One of our HomeSolver members, Emily, faced a challenge with her grandmother’s wooden dining table. It had numerous nicks and scratches from years of family meals and gatherings. Emily followed our step-by-step guide, carefully sanding and applying wood filler to the deepest nicks. She used a matching wood stain and finished with a protective varnish. Her patience paid off, and Emily loves how she was able to preserve a cherished family heirloom.
Another member, Mike, took on the task of restoring a scratched-up veneer coffee table he found at a garage sale. Initially unsure about working with veneer, he turned to our community for advice. After learning to use a special veneer filler and testing stains for a perfect color match, Mike transformed the table into a centerpiece for his living room. His story shows that with the right guidance, even tricky projects can have happy endings.
Tips from the Community
From our community forums, we’ve gathered some practical advice to help with your furniture restoration process:
-
Test Before You Commit: Many members stress the importance of testing stains and finishes on a hidden area. This can save you from unwanted surprises later.
-
Layer Gradually: When applying stain or paint, use thin layers and build up gradually. This not only gives you more control over the final look but also helps the finish adhere better.
-
DIY Repair Kits: Some members recommend keeping a DIY repair kit handy. These kits often include various fillers, markers, and tools to quickly address minor nicks and scratches as they occur.
Join the HomeSolver Community
If you’re tackling a furniture restoration project, consider joining the HomeSolver community. Our forums are full of helpful DIYers and experts eager to share their knowledge and experiences. Whether you have a question, need advice, or just want to share your success story, there’s a place for you. Join our community forums to get more tips and share your own restoration stories.
By learning from others and sharing your own experiences, you’ll not only gain valuable insights but also contribute to a supportive network of home improvement enthusiasts. Remember, no project is too big when you’ve got the HomeSolver community by your side. So, dive into your project with confidence, and remember that the HomeSolver community is here to help you every step of the way. Happy restoring!
Related
- How to Stain Pavers to Match Your Siding
- How to Reupholster Down Pillows- A Guide to Using Upholstery Shops and DIY Tips
- How to Replace Recessed Light Trim- A Step-by-Step Guide
- How to Paint Your Chain Link Fence Black and Enhance Your Home's Curb Appeal
- How to Insulate Between the First and Second Floors for Better Energy Efficiency