How to Restore a Teak Table with Hard Wax
Understanding the Beauty and Challenges of Teak Tables
Teak wood is loved for its strength and beautiful golden color. It makes any room look great, whether it’s an outdoor patio set or a dining table. But even sturdy teak needs some care to keep its shine. Over time, you might notice your table has scratches or fading.
You might think, “My table looks fine,” but those little scratches can add up. Restoring a teak table with hard wax helps keep it looking amazing. Hard wax not only enhances the wood’s natural beauty but also provides a protective finish to prevent future damage. To do this, you’ll need to strip it back and give it a hard wax finish. It might seem like a lot of work, but don’t worry—it’s worth it! Many have spent lots of time restoring a MCM teak table and found it rewarding.
Preparing Your Teak Table for Restoration
Before you start restoring your teak table with hard wax, it’s crucial to prepare the surface properly. This means stripping it back and then giving it a hard wax finish. Proper preparation ensures that the hard wax adheres well and the table looks as good as new.
Start by giving your table a thorough cleaning. Use gentle soap and warm water to remove any dirt or grime. Avoid harsh chemicals that can damage the wood. Once your table is clean, let it dry completely.
Next, you’ll need to strip the old finish from the table. Use fine-grit sandpaper to gently sand the surface, moving in the direction of the wood grain. This removes any old wax, oil, or varnish. Remember, trying to blend it in is essential, so take your time to ensure an even surface.
Safety is important, so wear a mask and goggles to protect yourself from dust. Make sure to work in a well-ventilated area.
Finally, wipe down the table with a clean, damp cloth to remove all sanding debris. Let it dry thoroughly, and you’re ready to move to the next step. Many DIY enthusiasts have found that this groundwork pays off in the end. With your table prepped, you’re set to give it a beautiful hard wax finish that will last for years.
Applying a Hard Wax Finish to Your Teak Table
Now that your teak table is clean and stripped back, it’s time to give it a beautiful hard wax finish. This step is where the magic happens, and your table starts to regain its stunning appearance. Using hard wax highlights the natural grain of the teak and provides a strong protective layer.
Start by choosing a hard wax that complements the color of your teak. Most hardware stores offer a range of options. Before applying the wax, ensure your table is completely dry and dust-free. Apply a small amount of wax to a soft cloth or sponge.
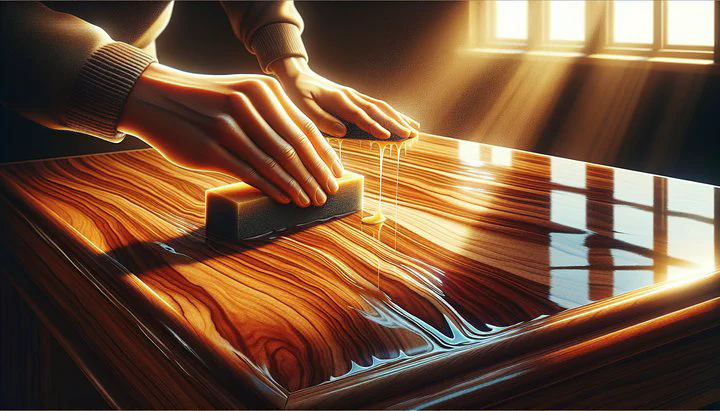
Gently rub the wax onto the table in circular motions, working with the grain of the wood. This helps the wax penetrate deeply and ensures a smooth application. As you go, focus on trying to blend it in so that you achieve an even and seamless finish.
Once you have covered the entire table, let the wax sit for about 10 minutes to penetrate the wood. Then, use a clean, dry cloth to buff the surface. This gives the table a lovely shine and enhances the wood’s natural beauty. You might find yourself smiling as you see the transformation.
Finally, allow the wax to cure for at least 24 hours before using the table. This ensures that the finish is fully set and ready to withstand daily use. With your hard wax finish applied, your teak table is not only beautiful but also protected for years to come.
Troubleshooting Common Restoration Issues
Restoring a teak table with hard wax can sometimes present a few challenges, but don’t worry—most issues are easy to solve with a little patience and know-how. Let’s tackle some common problems you might encounter during the restoration process.
One issue you might face is an uneven finish. This can happen if the wax isn’t applied evenly. If you notice areas where the finish looks patchy, try blending it in by gently reapplying a small amount of wax to those spots. Use a soft cloth and work in circular motions.
Persistent scratches or dents can also be troublesome. Lightly sand the affected areas with fine-grit sandpaper, always following the wood grain. Once the surface is smooth, clean away any dust and apply another layer of wax, trying to blend it in with the surrounding area.
Sometimes, the wax might not adhere well if there’s still residue left from the old finish. Carefully strip the area again and make sure it’s completely clean before re-waxing. Working in a well-lit and ventilated space can help you spot these issues early.
Many DIY enthusiasts have shared their success stories after encountering similar problems. Troubleshooting might seem like a hassle, but with attention to detail and a bit of practice, you can achieve a flawless finish.
Showcasing Your Restored Teak Table
Congratulations! You’ve completed the hard work of restoring your teak table with hard wax, and now it’s time to proudly display your masterpiece. There’s a great sense of accomplishment in seeing your efforts pay off.
First, find the perfect spot in your home to display your teak table. Whether it’s the centerpiece of your dining room or a charming addition to your patio, make sure it’s in a location where its beauty can be admired.
To maintain the table’s lovely finish, regular care is essential. Dust the table with a soft, dry cloth frequently. Should any spills occur, wipe them up immediately. For added protection, consider using coasters or placemats.
It’s also important to plan for periodic maintenance. Over time, you might notice the finish dulling slightly. A light buffing with a cloth or a minimal reapplication of wax can refresh the surface.
Finally, take pride in sharing your restoration journey. Your story can inspire others. By showcasing your restored teak table, you’re not only enjoying the fruits of your labor but also celebrating the art of DIY restoration.
By following these tips, your teak table will remain a cherished piece in your home. The satisfaction of restoring a table with hard wax is a testament to your dedication and skill, and now you can enjoy its beauty and functionality for many years.
Conclusion
Restoring a teak table with hard wax is a rewarding project that brings out the best in your furniture. With careful preparation, patience, and the right techniques, you can transform a worn table into a beautiful piece that enhances your home. So gather your tools, embrace the challenge, and enjoy the satisfaction of a job well done. Your restored teak table is more than just a piece of furniture—it’s a testament to your creativity and hard work. Happy restoring!
Related
- How to Stain Pavers to Match Your Siding
- How to Reupholster Down Pillows- A Guide to Using Upholstery Shops and DIY Tips
- How to Replace Recessed Light Trim- A Step-by-Step Guide
- Restoring Furniture with Nicks and Scratches- A DIY Guide
- How to Paint Your Chain Link Fence Black and Enhance Your Home's Curb Appeal